
The Pivot Table is a dynamic content type that allows you to upload CSV data, and return a feature rich data table complete with facets and search.
March 30, 2023The Pivot Table is a dynamic content type that allows you to upload CSV data, and return a feature rich data table complete with facets and search.
Example using the Pivot Table Display Type
Example Using the Advanced List Display Type

Please Note
Additional tickets to enhance the styling and mobile responsiveness of the new Advanced List display option for Pivot Tables are pending. In the meantime, the CMS Support Team recommend users continue to leverage the Pivot Table display option for Published pivot tables.
How to Create a New Pivot Table:
Required Steps
- Select Pivot Table under the Content - Add Content option of the shortcut bar
- Enter the title of the node in the title field. Helpful Hint: A good descriptive title helps boost the search relevancy of the pivot table.
- Enter the Summary Text. The summary text displays as the text to provide context within a search result.
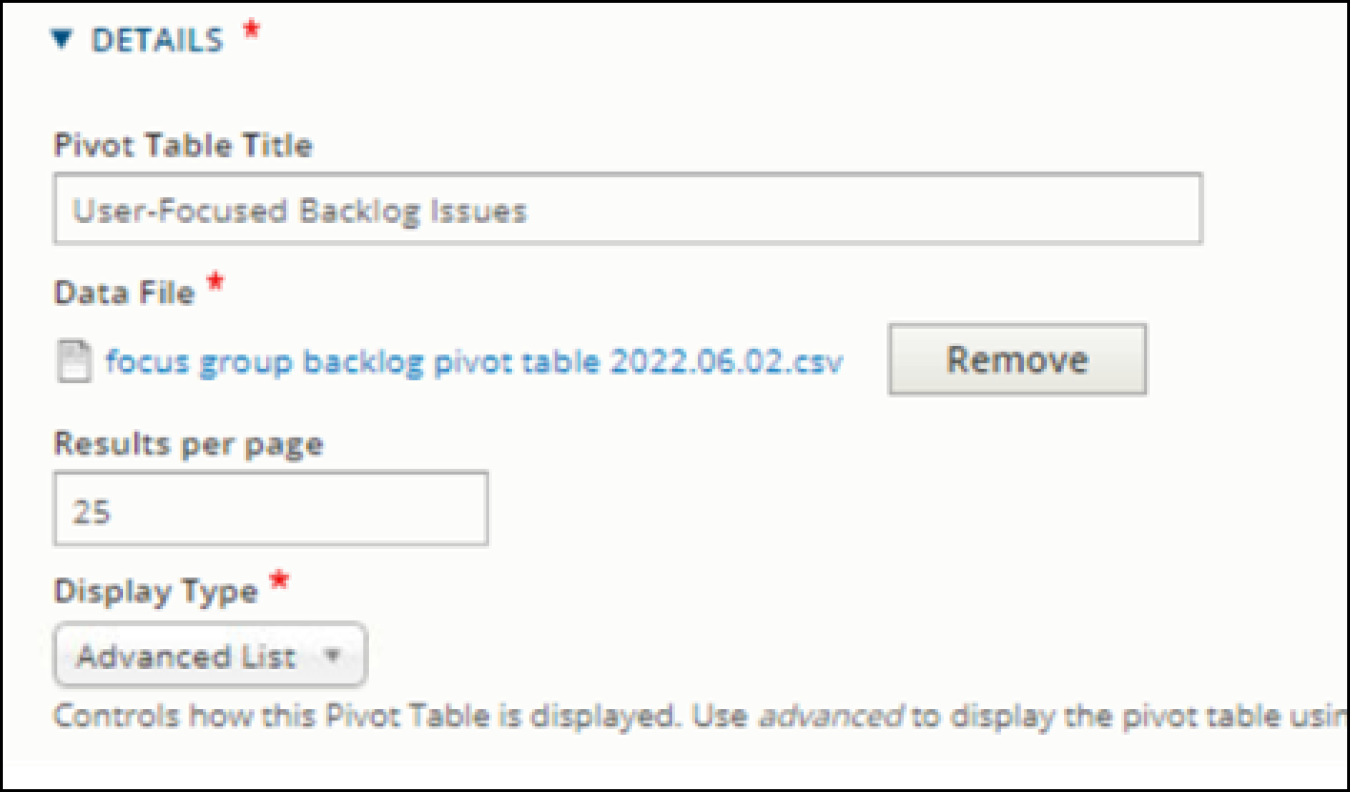
- Enter a title for the pivot table data. This title provides context for the pivot table data set.
- Click Choose File to Attach the .csv data file from your local drive to the pivot table.
- You can click Remove to remove the current .csv file and upload a replacement file.
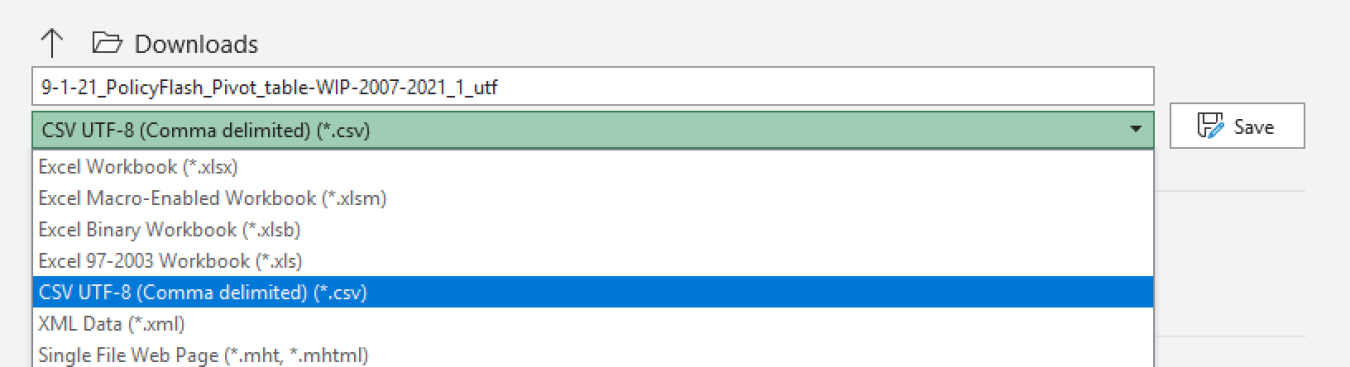
- When saving as .csv from MS Excel, the file can include ‘special’ characters, which do not work well when uploading the file. You can clean up the file by saving it as a .csv file from Google Sheets or cleaning up the .csv in a .txt file.
- Enter the column title from the .csv file in the CSV Column Title field
- Make sure the title matches exactly to the column title used in the .csv file
- Column titles in the .csv cannot include spaces—use Analysis_Categories vs Analysis Categories
- If spaces are included in the .csv column titles, the pivot table will not render
- Select the type of data represented in the .csv column in the Data Type field.
- Accept the default setting or select Date, if the .csv column is a date.
- Select the Display Option
- When configuring your pivot table, you will be given the option to display your content in the classic pivot table display format, or as an Advanced List. The Advanced List option will have a different look and feel, as well as additional colors that do not appear on the regular Pivot Table Display.
- Click Save as draft for publish if desired.
Struggling with your Pivot Table?
Common pitfalls:
- Trying to upload the wrong file type
- Entering a Column Title that does not match the Column Title displayed in the .csv
- Including spaces in the.csv Column Title or after content in cells
- Failing to configure all desired columns in CMS
- Including special characters.
Known Issues with Pivot Tables
Allowing Special Characters (non UTF-8) to display in table
Facet search for results LIKE the item selected
Recreate Pivot Table "Link To Node" functionality
Rendering Blank Rows
Advanced Steps
- Select Pivot Table under the Content - Add Content option of the shortcut bar
- Enter the title of the node in the title field. Helpful Hint: A good descriptive title helps boost the search relevancy of the pivot table.
- Optional: Enter the short title.
- Enter the Summary text. The summary text displays as the text to provide context within a search result.
- Optional: Add Thumbnail. You may provide an optional image that will be used as a thumbnail or background image when the photo gallery node is referenced.
- Optional: Add a Banner image. The banner image displays as background behind the Article title and date. The minimum recommended size for a banner image is 1240x600px. If no Banner image is applied, background defaults to display the dark green texture behind the title and date text.
- Optional: Add a Banner Color. This sets the text to either light or dark with optional light and dark gradient background. This helps you ensure the node title contrasts with the background image for legibility and accessibility.
- Enter a title for the pivot table data. This title provides context for the pivot table data set.
- Click Choose File to Attach the .csv data file from your local drive to the pivot table.
- You can click Remove to remove the current .csv file and upload a replacement file.
- When saving as .csv from MS Excel, the file can include ‘special’ characters, which do not work well when uploading the file. You can clean up the file by saving it as a .csv file from Google Sheets or cleaning up the .csv in a .txt file.
- Optional: Use the results per page field to set the maximum number of records to display per page.
- Add Columns
- Enter the column title from the .csv file in the CSV Column Title field
- Make sure the CSV Column Title matches the .csv file
- Column titles in the .csv cannot include spaces—use Analysis_Categories vs Analysis Categories
- If spaces are included in the .csv column titles, the pivot table will not render
- Enter the column location in the CSV Column Location field. The column location is the numerical placement of the column within the .csv file.
- The number designation of the first column in the table is 0. For example, in the table below, the Title column is 0, the Technologies column is 1, and so forth.
- Optional: Enter a column label for display within the pivot table in the Pivot Table Column Label field. Otherwise it will default to the CSV Column Title
- Optional: the type of data represented in the .csv column in the Data Type field.
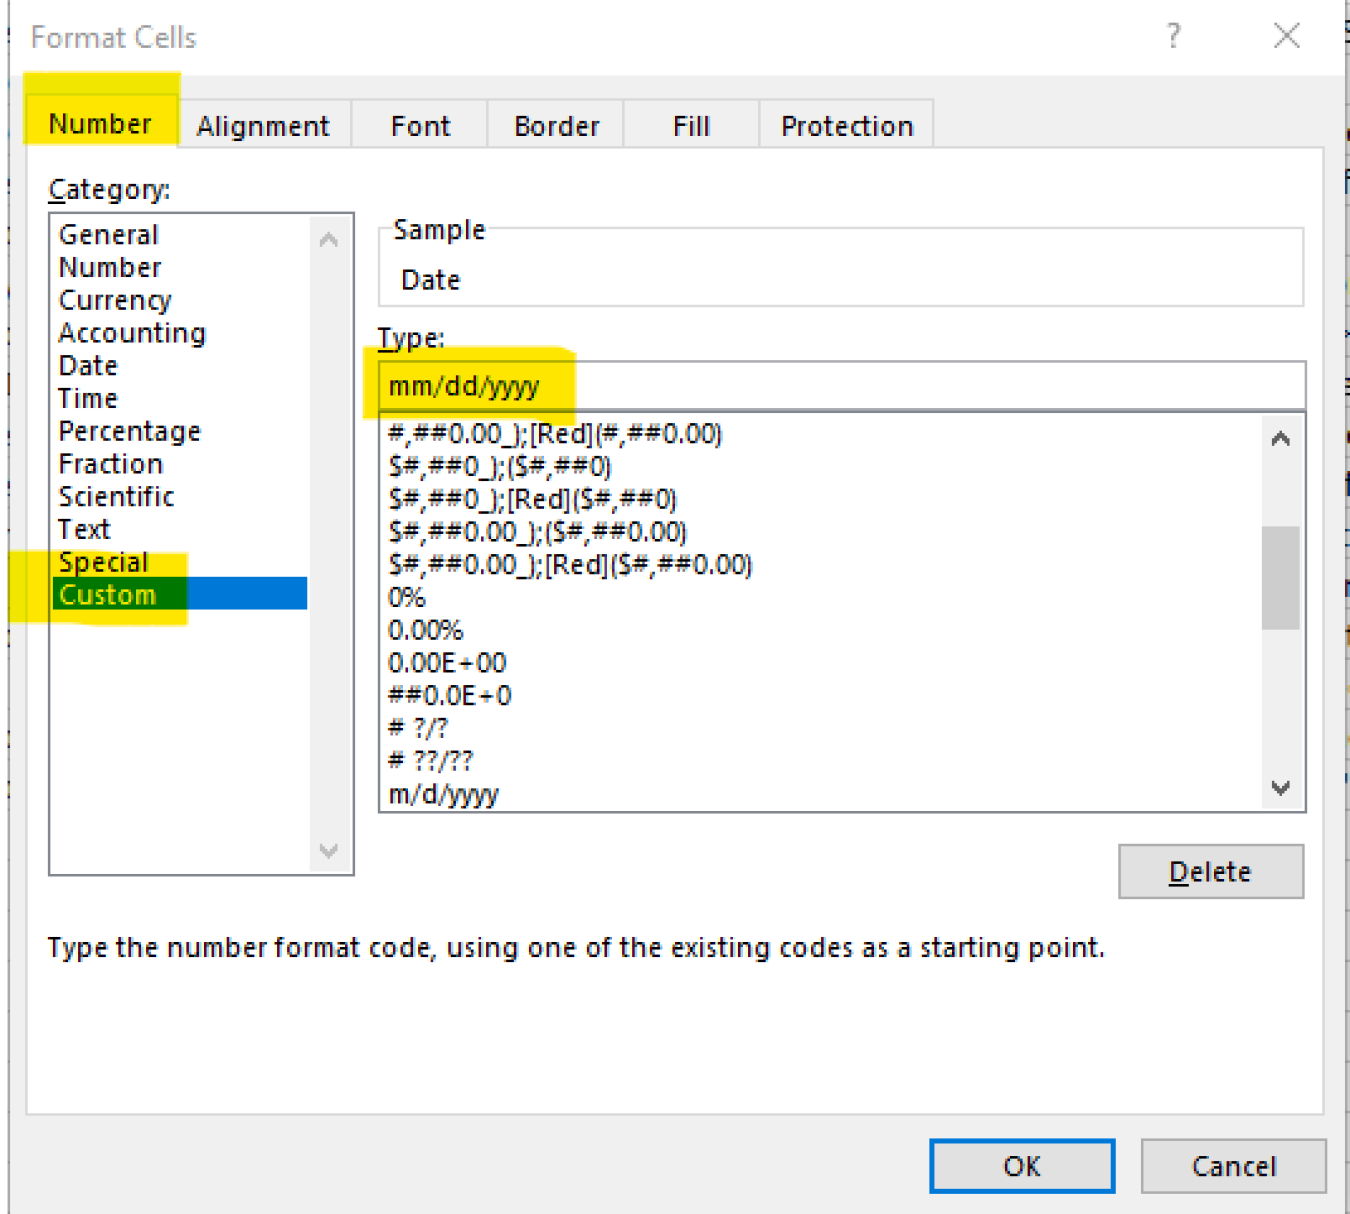
- Accept the default setting or select Date, if the .csv column is a date.
- Please note Date format must be exactly MM/DD/YYYY
- Optional: Set the width of the column in pixels in the Column Width (PX) field. Column width relates to the width of the table column in pixels (px) being rendered for display.
- Note: Link to Node functionality is currently under reevaluation, and is not currently operational.
- Optional: Select Not Visible If you do not want this field to display in the pivot table.
- Not Visible columns can still be searched or used as a facet.
- If there are extra columns in the .csv that you do not want searched or displayed, best practive would be to remove them from .csv
- Optional: Select Not Searchable If you do not want a column to be searchable.
- Optional: If you want to disable sorting on this field, select Not Sortable.
- Optional: If you want to enable this field as a facet item, select Facet Item.
- The facet is built using unique keywords that are separated by semi colons (;) in the .csv file.
- Within the .csv file, ensure the keywords match exactly if you want rows of data to share the same keyword. For example: Merit Review and merit review are considered different keywords.
- Ensure: matching case and no trailing spaces.
- Optional: Set the display order of the facet blocks by using the Facet Order field for each facet item.
- Start at 1 for the first facet. Using zero hides the facet.
- Optional: If you want to overwrite the default facet label (.csv column title), you can enter a custom label in the Facet Label field.
- Optional: You can enter hover text for the facet label in the Field Hover Text field.
- To add another .csv column item, click Add Data Table Column and repeat step #9 including the bullet items, as appropriate.
- Use the sort icon to drag and drop column definitions to rearrange the column display.
- Make sure the Column Order and the CSV Column Location field all match the column order in the .csv for best results
- Enter the column title from the .csv file in the CSV Column Title field
- Optional: Configure the default sort for the table using the Data Sort fields
- Enter the column number to sort on in the Column to Sort On field.
- Optional; Select the order of the sort (that is—ascending or descending) from the Column Order drop-down.
- The number designation of the first column in the table is 0. For example, in the table below, the Title column is 0, the Technologies column is 1, and so forth.
- Save, review the Active Draft, and publish if desired.
Cool "new" feature: link by Node ID
Use cell value "/node/12345" to automatically add the node title and link to fill that cell!
Creating links from /node/[nid]: Workaround
I’ll show you how I went about setting up the fix for the Pivot Table node: /management/acquisition-letters. I have attached all the files separately in this process, so you could see it at every stage, though you could just overwrite the same file and re-upload it.
- I downloaded the file from the Pivot table and opened it in excel : Step 1: Original_Table.csv
- I created an excel formula to combine the tile and link into HTML : Step 2: Excal-formula-WIP.xlsx
- I Copy/pasted the VALUES using ctrl-ALT-V back into the Subject Column, deleted the last line and Saved As.. a .csv file:Step 3: Replaced-HTML-Links.csv
- This file isn’t QUITE ready to go yet- as Excel puts an extra blank line at the bottom of .csv’s which in turn adds an extra blank item to the Facet Item Fields. This extra line doesn’t get created in Google Sheets, so you need to use a text editor like Notepad to remove the blank line at the bottom. Step 4: Replaced-HTML-Links-trimmed.csv